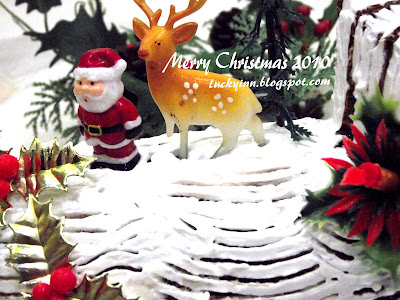
Thursday, December 30, 2010

芝麻香~黑白芝麻芝士脆饼

正在看晚报的男人,突然亮起了眼睛问:“你烘什么蛋糕,那么香?”
女人:“不是蛋糕啦,是饼干。”

这香味是parmesan 芝士散发出来的~
一口咬下,嗯~ 是脆的。
这款脆饼的魅力不只是因为它脆而已~芝麻是功劳之首。
在口里的芝麻香~我找不到文字来形容 (真是,书到用时方狠少)
总之,就是因为芝麻~越咬越香!!!!

男人说:“改天不要做蛋糕啦,饼干比较好吃又有营养!!”
喜新厌旧,晕~~

食谱来自 :Y3K
材料:
A)
牛油 60克
糖粉 52克 (我不嗜甜,放40克)
蛋白 66克 (2粒蛋白)

B)
面粉 80克
粟米粉 20克
Parmesan芝士粉 1汤匙 (我放2汤匙)
白芝麻 1汤匙 (我放2汤匙)
黑芝麻 1汤匙 (我放2汤匙)

做法:
1。将(A)料搅拌至幼滑,加入(B)料拌匀,置放20分钟。
2。将(1)秤每份7克,放在铺了纸的烘盘上,用钢匙沾了油按扁。
3。将(2)放入预热烘炉,以150度烘15分钟。

Monday, December 27, 2010

热乎乎の下午茶~迷你吞拿塔

几个月前的一个周末下午,迷你Tuna塔 出炉被扫光后。孩子们从那天起就一直嚷着要我再做。

每次当我询问他们~“今晚要妈咪烘什么蛋糕?”
他们一定说~ “Tuna Tarts, Tuna Tarts, Tuna Tarts!”

这个周末,庆祝圣诞兼家婆的生日,我们的肚子都撑大了不少。翻了翻食谱,想找个少糖的点心。好吧~ 就应孩子们的吵吵嚷嚷,乘这个炎热的午后,为了堵住他们嘴;就再上这款热乎乎的下午茶点心。
之前,是铺上片装的Cheddar cheese(撕成小片)
这次,是用pizza cheese (刨丝)
所以卖相比上次更赞哦!!

Friday, December 24, 2010

梦幻的白色圣诞~树桐蛋糕

炎热的马国没有白雪纷飞~


一个白茫茫的树桐蛋糕,是不是可以让我幻想一下自己置身在一片白雪中等着圣诞老人来派礼物??O(∩_∩)O


叮叮当。。。叮叮当。。。铃声多响亮!!

今天是平安夜~ 一个充满安详的浪漫夜晚。


祝福大家,
圣诞快乐!!!

Monday, December 20, 2010

送金元宝来咯~金瓜黑芝麻汤圆

今年的圣诞愿望实现了~一个满意又获得大家好口碑的处女树桐蛋糕。
再接再厉,隔天又搓搓揉揉了元宝汤圆。

在2010年殿尾的12月里,东西方的压轴节庆中,我连续接了两个好运。是不是意味着,2011年我就要又发又旺了呢?希望如此吧!

这个金瓜汤圆外表金黄闪闪,真的很像一粒粒的元宝。一口咬下去,香香的黑芝麻内陷更是我的最爱!配上红糖水,每个尝过的人都说比外面卖的还好吃!!真的要谢谢annann分享的食谱^_^

食谱摘自:人生加油站

食谱(可做47粒)
糯米粉 ~ 300g
南瓜泥 ~ 160g
幼糖 ~ 2汤匙
粟米油 ~ 1汤匙
清水 ~ 200-220ml

做法:
1。 将糯米粉、幼糖、粟米油和南瓜泥搅拌均匀。
2。 慢慢加入清水揉拌。(千万别将水一次过倒入。
3。 揉拌均匀后做成小·圆球粒,按扁包入黑芝麻馅料。
4。 煮滚一锅热水,再准备一盆冷水。
5。 将汤圆粒放进热锅里煮熟,捞取放进事前准备好的冷水里泡一泡。
6。 捞取汤圆与糖水一起享用即可。

馅料:
奶油 ~ 65g (我用无盐奶油)
黑芝麻(炒香搅碎)~ 130g (我直接用黑芝麻粉)
糖粉 ~ 65g馅料

做法:
1。把全部馅料用手揉成团。
2。再把(1)揉成小粒团。
3。放入冰箱冷藏半小时。

汤水做法:
水 ~ 1000ml
糖 ~ 4汤匙 (我省略)
黑糖 ~ 1 粒 (我用1 勺brown sugar)
老姜 ~ 5片 (我用3大节老姜,拍扁)
班兰叶 ~5片,打结

1。全部材料用中火煲20分钟即可。

Saturday, December 18, 2010

2010 X'mas Wish ~ my very first X'mas Yule Log

Ho Ho Ho!!!


Christmas is just around the corner... Santa Clause is coming to town!

My christmas's wish this year has come true ~ my own handmade X'mas Yule Log!!

I am very very excited once i have done my decoration. Oh my god! It looks really like a log.


Well, i did feel tired for the 3.5 hours spent for the whole process, but it's worth a try. I just feel very contented.


I wanna wish all my friends,

Merry Christmas and Happy New Year 2011.... Yeah!!!
Swiss Roll

3 egg yolk

30g sugar

50ml corn oil

100ml milk

80g superfine flour

20g cocoa powder

1/2 tsp baking powder

4 egg white

1/8 tsp cream of tartar

50g sugar


Methods:

1. Mix egg yolk and sugar, then add in corn oil and milk, combine well.


2. Fold in flour, cocoa powder and baking powder.


3. Whisk egg white until bubbles form, add cream of tartar. Add sugar by 3-4tims while whisking, until peak form.


4. Fold 1/3 egg white into egg yolk mixture. Then pour back to the remaining egg white and mix well.


5. Pour into a lined & greased baking tray (29cm X 29cm). Bake in a pre-heated oven at 160C for about 25 mins. Remove from oven.


6. Invert cake into a clean sheet of grease prrof paper and remove lining paper from the cake.


7. Trim off the edges with a knife, spread cake with blueberry whipped cream.


8. From one end, start to roll up using hands, use paper to complete the rolling up by pulling it.


9. Wrap up the cake with the paper and refrigerate 1-2 hour.


10. Take the swiss roll from fridge, cut 1/4 and apply some chocolate whipped cream and stick to any part of the longer swiss roll.


11. Spread the chocolate whipped cream to cover all the swiss roll. Use a toothpick to draw lines on the whipped cream.


12. Refrigerate for 4 hours. Decorate as desire.


Filling

50g whipped cream (whipped)

100g blueberry filling


Chocolate Topping

150g whipped cream (whipped)

120 baking chocolate

20g butter


Methods:

1. Using double-boiled method to melt the baking cbocolate with butter on stove.

2. While warm, pour the melting chocolate into whipped cream. Stir quickly. Refrigerate.

Friday, December 17, 2010

Melt in the mouth~Featherlight Cheesecake

The above photo are my 2nd attempt baking this featherlight cheesecake.

My 1st attempt failed because the bottom of the cheesecake was a bit wet and soggy. I got very disappointed due to my high expectation since its aroma filled the whole room while baking.

Luckily, after overnight refrigerated, it's not as soggy as lastnight, but still contains some liquids. It tastes like ice-cream and my children love it so much. We manage to finish all the whole plate in a day, and they are asking for more!!!

After a day thought, i intend to try it again as i would very much like to share this recipe with bloggers.

I have learnt that:

a) It's underbaked. As the recipe requires lots of liquids, it needs more time to bake. This time, i reduce the milk to 200ml and baked 1hr20mins.

b) It cracks at top and uncooked at the bottom, so i put the cheesecake at the middle-lower rack.

c) As this cheesecake is really soft and featherlight, need to handle with care.

This cheesecake is moist, tastes delicious after being refrigerated. It just tastes like ice-cream, and melt in the mouth.

Recipe link from Wendy
Originated from Alex Goh"Fantastic Cheesecake" cookbook

Ingredients:
250ml milk (I use 200ml at the 2nd attempt)
20gm butter
125gm cream cheese(room temperature)
50gm flour
3 egg yolks
1 tsp vanilla extract

3 egg whites
1/8 tsp cream of tartar
80gm sugar (I use 75gm)
Pinch of salt½ Tbsp

cocoa powder1 Tbsp (I use 2 tbsp)
boiling water

Methods:

1. Line the base of a 8 inch square pan and preheat the oven at 150/160C.

2. In a medium sized bowl, cream cream cheese until smooth.

3. Bring milk and butter to a boil and pour ¼ of it into cream cheese and gently stir until incorporated. Pour in another ¼ the milk and stir again. Lastly pour in all the milk and stir until smooth. (At this point, prepare some boiling water)

4. Let the cheese mixture cool down and put in flour. Mix until smooth. Then put in egg yolks and vanilla. Mix until smooth.

5. In another clean bowl, beat egg whites until frothy. Put in salt and cream of tartar and beat until soft peaks. Put in sugar gradually and beat until stiff.

6. Put 1/3 of egg whites into cheese mixture and fold gently but quickly.

7. Pour the cheese mixture into the egg whites and fold until well incorporated.

8. Mix cocoa powder with boiling water until smooth. Put in a few tablespoons of the cheese batter and mix until a smooth chocolatey batter is formed.

9. Pour main cheese batter into prepared pan. Drizzle chocolate batter over main cheese batter.

10. Use a knife and cut through the batter to create a marbling effect.

11. Put pan into slightly bigger but shallower pan. Fill the bigger pan with boiling water until halfway up and bake for 50-60 minutes. (I baked 80mins)

12. When cake is baked, remove from oven and release the sides of the cake from the pan immediately by running a knife between the sides of the cake and the pan. Leave it to cool down totally and chill until cold before cutting.

Monday, December 13, 2010

手拌式的·~班兰椰丝小蛋糕

几个月前,尝试了一次手拌式的南瓜满分,失败了。没有搅拌器的打法,蛋糕根本发不起来,硬绷绷的成了kuih。怕了,怕了~不敢再对手拌式寄以厚望!再也不敢贪方便了~

前天,Bernice极力推荐这款一个打蛋器搞定的小蛋糕。我也罗嗦的一再跟她确定,蛋糕会松发,才决定试一试。

这次,我的确成功了!!手拌式的~真的会松发,不过不及搅拌器的食谱那么松软。这款蛋糕的优点胜在“够香”。每次一打开tupperware,那股班兰的天然香气真的很香。还有混在蛋糕里的口口椰丝,每一口都香进嘴里!就是这股香味及口感,可以让人连续吞下两粒~

食谱摘自:Bernice的小天地 (以下的分量可做12个)

材料:
栗米油 ……… 150g
幼糖 ………… 120g(我只放100g)
鸡蛋 ………… 4粒(打散)
自发面粉 …… 150g
干椰丝 ……… 30g
班兰香精 …… 1.5小匙(我用8片班兰叶加两汤匙水打成汁)
做法:
1)将干椰丝和过筛后的自发面粉混合均匀,备用。
2)栗米油和幼糖用打蛋器搅拌至糖溶解。
3)鸡蛋液和做法(1)分三次加入做法(2)中搅匀。
4)最后加入班兰香精拌匀即可。
5)用汤池将面糊舀入纸杯中约八分满。
6)送入预热烤箱,以150度烘烤25分钟或至熟。

Saturday, December 11, 2010

蘑菇奶油烤饭Baked Cheesy Mushroom Rice

孩子们不太能接受灯笼椒和巴西利的味道;所以这个口味烤饭不怎么受落。
他们把上层的芝士解决掉,再“寻宝般”把蘑菇都挖走!然后,把剩下的白饭丢回给我。

天啊!我可不想当饭桶 :-O

加了蘑菇汤的白饭并没有想象中带咸的滋味。调味料应该加重,或添加香肠、火腿等腌制的材料,才能使这道烤饭更入味。
烘烤的最后5分钟,我特地把烘炉调成上火。所以上层的芝士被烤的金黄色~脆脆的!


食谱来自YumYum杂志

材料:
3大匙油
3碗白饭
1罐罐头蘑菇,切片
1罐蘑菇浓汤 (我用Campbell Mushroom Soup)
2大匙巴西利碎
1/2粒红灯笼椒,去籽,切小粒

调味料:
1/2小匙盐
1小匙黑胡椒碎

100g Cheddar 芝士丝 (我用Pizza芝士丝)

做法:
1. 预热烤箱至200C。小火炒香洋葱,再加入蘑菇炒香。盛入大腕中。
2.加入其余材料和调味料搅拌,舀入烤盘中。
3.将芝士撒上,送入烤箱以200C烤25分钟或至金黄色,即可取出享用。

Wednesday, December 8, 2010

酥、松、香~ 奶油芝士饼干Cream Cheese Cookies

认识我的人都知道我最不“ 撘寒”的就是芝士~
那天在QiQi家看到这个奶油芝士饼干,简直就是垂涎三尺~
嘿嘿嘿!我知道我不会放过它的~
本来是要把它列入新年饼里,可是意志力就是战胜不了欲望~
不能等啦!!(这应该不是件坏事吧O(∩_∩)O)
这款饼干真的如QiQi所说的~
很酥、很松、很香!!!
哪怕多高的热量,不吃真的对不起自己哦~
拌入Cream Cheese在面糊里~
那股奶油芝士的香味,还有还有那口感,
比起牛油饼干是更上一层楼哦!呵呵呵~

食谱摘自Qi Qi in the House (我做了食谱的双倍)

材料:
牛油 butter 200g (室温软化)
奶油芝士cream cheese 100g (室温软化)
糖sugar 90g
蛋黄egg yolk1pcs
香草精1/2tsp

粉料:
面粉250g
泡打粉1/2tsp
(以上粉料混合后搅拌均匀)

做法:
1) 把室温软化的牛油,奶油芝士,加糖混合后用手动搅拌器打发成羽毛状;
2) 加鸡蛋和香草精,搅拌均匀;
3) 加入粉料,用橡皮刀拌成面团;
4) 用挤花袋把面团挤在烤盘上,饼干之间留些许距离。
5) 烤箱预热160°,烤25分钟。(温度视个人烤箱)

贴士:芝士的量可以根据口味略微调整。

Monday, December 6, 2010

无味海鲜~咸蛋虾Salted Egg Prawn

哎、唉、哎。。。
美丽鲜艳的大侠(虾)图还可以唬唬人,可是那味道却像没有半点调味的清蒸虾!
艳丽的虾红(),香味四溢的咖哩叶(),却平平无味(独缺味蕾)。
为什么它完全不入味??!!主人说,我真不是煮饭的料!哎~我也承认!所以我注定不能当煮饭婆~不然一定很多剩菜~~~~(>_<)~~~~
主人还很赏脸的吃了几只,剩下的我通杀~因为我是海鲜迷!也幸好这大虾够新鲜,肉够厚实!
究竟是哪儿出了问题~姐妹们请指点指点!!!
以下是我的烹调方法。。。
把虾沾上粟粉,泡油至7分熟,捞起备用。
烧热锅,爆香葱头蒜米,加入咖哩叶,炒至香。
加入把蒸熟的咸蛋黄,炒均匀。加入淡奶,炒至收汁。
放入虾,翻炒,盛起。
我用了12只虾,两粒咸蛋黄,约100ml的淡奶。是否咸蛋黄太少,淡奶太多??还是我漏了什么??

Saturday, December 4, 2010

精致小点*一口酥*

那天看到面子书友Jess上了这道小点,马上跟她要了食谱。她也很耐心的一字一字打出食谱给我。很感激她无私的分享才让我有这份口福^_^
很精致巧小的一口酥~每个只有1.5公分哦!
家里就刚刚好剩下一点豆沙和一点豆蓉,就通通消耗完吧!!
豆沙配上黑芝麻;豆蓉用白芝麻点缀~ 黑白两道我通吃!!O(∩_∩)O哈哈~

我喜欢小小一粒,很方便;就这样丢进口里,hoop!
小孩吃了,又不怕他们掉个满地酥皮削。
酥皮材料:
牛油100g
糖粉55g
B蛋1个
低筋粉145g
杏仁粉40g

内陷:
豆沙350g

表面装饰:
蛋黄一个
黑芝麻少许

做法:
1.将软化牛油加入糖粉,用橡皮刮刀稍压,用mixer打发至颜色变淡。

2.加入蛋液快速打均匀。

3.低筋粉及杏仁粉放在同一容器,一起沥入蛋糊中,以刮刀拌均。

4.将面团压扁并用保鲜纸包好,冷藏1个小时。

5.将红豆分割约70g,共5个,分别搓长约20~25公分的条状。

6.将做法(4)的面团分割成每个70g,共5个。

7.桌面撒下面粉将小团搓成约与豆沙一样长。

8.将每条面团分别轻轻捍成长片状,再分别包入1条豆沙条,将收口捏紧。

9.再稍微搓动一下,给他均匀。

10.用刮板切成长约2公分的小段排入烤盘内。

11.蛋黄搅散后,在面皮表面均匀刷上2次蛋液,最后撒上黑芝麻做装饰。

12.预热烤炉180度,烤约10~15分钟或黄,即可取出。

Wednesday, December 1, 2010

Coffee Almond Chiffon咖啡杏仁戚风

这是一个不一样的戚风~
用另一种方式来品尝戚风~
并重
我家没有3合1咖啡,临时就冲了两大匙的Nescafe
闻到了苦苦的咖啡豆,就再加了三大匙的幼糖及creamer
结果,每口戚风都是特浓的咖啡香

除了天生柔软细腻的戚风质感,再配上咬劲十足颗颗粒粒的杏仁碎
软的、硬的都在我的口里 O(∩_∩)O


食谱摘自:Min's Blog (我做了两个迷你戚风)
蛋黄 3粒
砂糖 20g (我减少10g)
植物油 45g
热牛奶 50g (我用鲜奶)
即溶咖啡粉 2大匙 (我用2大匙Nescafe+3大匙幼糖+1大匙creamer)
低筋面粉 70g
发粉 1/8小匙
坚果碎 55g

蛋白 3粒
砂糖 60g
塔塔粉 ¼小匙
坚果碎 25g

1。鲜奶, Nescafe, 幼糖及creamer混合均匀,煮滚,备用。
2。蛋黄和砂糖搅拌均匀,加入植物油,牛奶搅拌均匀。
3。筛入自发面粉,搅匀。
4。蛋白和塔塔粉打至起泡,分次加入砂糖,打至硬性发泡。
5。把1/3的蛋白霜加入蛋黄糊里拌匀,再把其余的蛋白霜轻轻拌入至均匀。
6。将55g的坚果碎拌入面糊里面。
7。把面糊倒入烤模,再把25g的坚果碎撒上去。
8。放进预热180度的烤箱,烤35分钟。

Monday, November 29, 2010

Orange Muffin 香橙满分

之前用鲜橙做戚风Orange Chiffon ,就为它的香甜混在蛋糕里留下深深地印象。
无奈这个香橙满分不能满足我的期望~微微的香橙风味,不是很浓。
或许把鲜橙汁换成浓缩的橙汁,才能满足我对橙满分的要求。
反倒是巧克力粒喧宾夺主,让人误把它当成了主角。
我好喜欢照出来的感觉哦~
很orange,很bright,很sunny
让心情特别开心(*^__^*)
食谱摘自:星厨房 (以下分量可做8个满分)

材料:
无盐牛油 125 克
幼糖 100 克
鸡蛋 2 个
橙皮屑 1 小匙
鲜橙汁 50 毫升
特幼粉 115 克
发粉 1 小匙
盐 1/8 小匙
巧克力粒100克 (我另外加上的)
做法:
1.牛油及幼糖打至松发,加入盐拌匀。
2.分多次加入蛋液,每次加入都必须搅打至看不见蛋液才加入接下来的蛋液。
3.特幼粉及发粉混合后直接筛入(2)内。
4.接着倒入橙汁及橙皮及巧克力粒,使用刮刀拌匀。
5.倒入纸杯内八分满,可做9个中型玛芬。
6.预热烤箱160度,烘烤20分钟。

Tuesday, November 23, 2010

Cotton Cake 柔绵绵的棉花蛋糕

在这懒洋洋的假日午后,软绵绵的蛋糕,是我此刻的心情写照。
一阵阵鸡蛋香从烤箱扑鼻而来,一个人躺在沙发上陶醉在其中。

棉花蛋糕果然名副其实,柔软似棉花。那种轻盈的质感,让人不禁一片接着一片;不油腻,也不会罪恶。真的,吃上四五片都不自觉!

我建议~一定要放进冰箱。冷冷冰冰又软软绵绵,够清凉!!我个人认为它比轻乳酪蛋糕更可口。我做了以下分量的双倍,共用了六粒鸡蛋,所以这棉花蛋糕有着很香的鸡蛋香味。

食谱摘自:Min's (我做了以下分量的双倍)

30克 牛油
40克 低粉
40克 淡奶
3个 蛋黄
3个 蛋白
40克 细纱糖

1. 溶化牛油,乘热加入过筛了的面粉。
2. 轻轻打散蛋黄,慢慢加入淡奶搅拌均匀。
3. 把(2)的蛋黄,淡奶分次加入牛油面糊中拌匀。
4. 蛋白打至起泡,加入糖,继续打至涩性发泡即可。
5. 分次和蛋黄面糊混合均匀。
6. 倒入3个2x5寸锡纸模内,轻摔一下,震掉大气泡。
7. 预热烤箱170度,隔水烤8分钟后,温度调至150度,再烤20分钟。
8. 出炉后倒扣放凉,脱模切片。

Saturday, November 20, 2010

清热利尿~车前草薏米水

尿道发炎~是一种十分恼人的感受。好像频频尿急,却排尿困难。
三几个月就发生在我身上一次,不能根治。

这一次,情况好像比较不同。下腹好像“鼓鼓涨涨”的,也不怎么会肚子饿。验尿的结果显示没有感染细菌,可是尿液带血丝。会是生石吗?

家婆捎来一个中草药妙方~车前草煲薏米水。清热利尿,并增加尿素、尿酸及氯化钠的排出。


煮法:
一扎车前草 (除须、洗净)
100g 中国薏米

一窝水滚一滚,不用加冰糖

味道有如淡淡的薏米水,不是很可口~~~~(>_<)~~~~